


Welcome.
Glad to have you along! I'm so close to 100 followers. You can still be a silent observer (there's never any pressure to post a comment) but if you'd like to follow along, just click on the "Follow" button under the "Followers" widget on the right sidebar of my blog. Can I get to 100 this week..pretty please?
We've been throwing Halloween parties the last 20+ years. For my new followers, when I met my husband in college, he even decorated his dorm room for Halloween...we're that kind of crazy about this holiday.
One of my favorite Halloween parties was when Emma was six years old. It was our first kid-friendly party (no adults allowed) and the kids had a blast.

 While we're talking about parties, here are a few of my favorite Halloween party favor ideas. My sister made these broom treat bags for her son's Harry Potter Party. You can find can find more ideas for throwing a Harry Potter party here. This was one of my favorite birthday parties.
 Broom Treat Bags
Supplies:
Two 4 1/4-by-8-inch brown paper bags
Craft knife or scissors
Small branch (we used pretzel rods instead)
Candy
1. Unfold one brown bag and push out base; fold in the left and right sides.
2. Use a craft knife or scissors and cut the bag into thin strips about 1/4 inch wide. Make sure you stop short of the base.
3. Cut thin strips into the top, 1 1/2 inches of second brown bag. Fill the bag with candy
4. Open the shredded bag fully, laying it flat; place the filled candy bag inside the shredded bag.
5. Bring shredded bag up; insert pretzel rod in center, cinch top of bags together. Wrap with twine until bags are secure.
Cellophane Halloween Treat Bags
Cellophane bags filled with candy and embellished with candy tags make fun treat containers too. My local grocery store sells these bags in the baking aisle, but you can find them in the candy making aisles at most craft stores. Monster Munchies = Nerds
Dragon Teeth = candy corn
Bat Droppings = chocolate covered raisins
You can find free printable candy tags here.
Halloween Crackers
 Crepe paper
Scissors
Stickers
Toilet paper rolls or wrapping paper rolls cut in sections
Glue stick
Twine, ribbon or yarn
Plastic spider or bat rings
1. Cut an 11-inch square of crepe paper and a 4-by-7-inch piece of paper in another color; decorate with stickers or stamps.
2. Roll crepe paper around a candy-filled toilet-paper roll; glue seams closed. Wrap paper rectangle around center; glue.
3. Tie ends with twine; snip for fringe. Slip bat or spider rings over the ends.
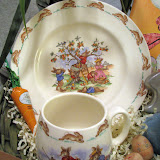
Halloween Candy Cups
 The white candy cups were purchased from my grocery store in the baking aisle. All I did was put a line of tacky glue around the center of the cup and pleated crepe paper around the cup, pressing the crepe paper folds onto the glue. I added a line of glue near the top of the cup and placed decorative ribbon along the top to give the cup a finished look.
Take-out Containers
Dollar Tree still has these orange containers available too. You could even embellish them with stickers. Welcome enchantment and costumes, decorations and candy.
Welcome to our favorite month of the year.
Halloween, we love you!
Coming soon...Halloween treat/dessert ideas.
 You still have time to enter my Halloween give-away. Just click HERE and leave me a comment to be entered. No strings attached. I was serious when I said I love giving away my crafty creations as much as I enjoy making them. Everyone is encouraged (even my silent observers). Drawing takes place October 20th at 8 EST.
 You still have time to enter my Halloween give-away. Just click HERE and leave me a comment to be entered. No strings attached. I was serious when I said I love giving away my crafty creations as much as I enjoy making them. Everyone is encouraged (even my silent observers). Drawing takes place October 20th at 8 EST.


12 comments:
I love all your Halloween party ideas! I remember seeing Martha's broomstick bags before, and I like the idea of the pretzel stick instead of stick from a tree so much better! Now I am looking forward to the Halloween food ideas! :)
So many ideas~makes me want to throw a party! You are so good about sharing.
Hope you have a good week! Keep on creating!
What cute ideas for favors. I am always amazed at how you can take the simplist things and make them grand.
I love your Blog! you are so creative! Beautiful family!
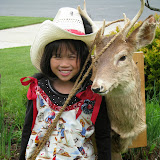
Oooohh, that last photo is creepy... :)
Great ideas! Hope you hit 100 this week! I am a new follower.
I didn't know about the hub's dorm room! What a hoot!
Love the punch idea and the to go boxes!
Hope you have a great week!
It's all so darn fun!! The worms in the punch bowl are esp cute!!
Ok, I've been a silent observer since just after Josie's heart surgery...but now I'm a new 'follower'! Love the worms in the punch! My boys would love that too!
Sue
The house looks great! It keeps growing every year. I still remember the parties back at AQ! Have a great party.
Hi Kim,
A belated thanks for your nice comments, and for following! I'm your newest follower:) For some reason my photo is one of those "mystery" photos, though! I'm from Michigan too! Your daughter's are just darling!
Post a Comment